Saturday, October 1, 2011

REBORN is Born

Two years ago God blessed us with our first son, Carter, through the miracle of adoption. He came into our lives after a long season of trusting God to write the story of our family.

Along the same time, God allowed us to plant a multi-ethnic church in Mobile.

As we plan/pray/think about the future of our family, our hearts have been turning again toward adoption. There are so many questions. When will this happen? Will we adopt an international child (we would probably prefer this) or domestic? Only God knows the answers to these questions. Another looming question is how will we prepare to finance an adoption (20-30 thousand if international)?

As we sought to answer this question, an idea was born. For quite some time we have enjoyed furnishing our home with pieces we have salvaged from thrift stores, trash piles, or junk yards. We have even sold a few to friends or at local consignment stores.

So as we thought of creative ways to contribute to our "adoption fund" an opportunity presented itself. This week we started Reborn Interiors.


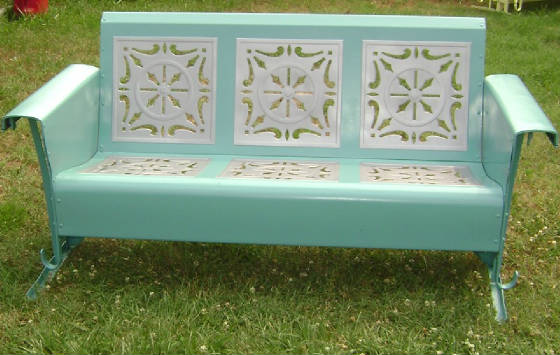
In addition to his full time work at All Nations Community Church, Chris will be selling his painted/distressed furniture at Antiques at the Loop. We moved in today! Surprisingly, they put us front and center- first booth on the right. This is one of the best spaces in the whole store because it is by the register and has prime window space!


Some of you may know that Julie's dad and step mom, Jerry and Pam Mitchell, own a Folk Art Company in Milton, FL. They make hand painted signs on reclaimed barn tin. They have been in business for over 20 years and wholesale to thousands of shops all over the US.

In addition to selling painted furniture we will be carrying an amazing line of Blackwater Folk Art.

You have GOT to see this stuff! We have seasonal items (Fall stuff is in now) as well as great unique gifts at affordable prices (my only commercial, I promise). We love the idea of buying from our family and supporting their business too.


We appreciate your prayers as we set out on this new adventure! And when you get a chance, come shop our booth at Antiques at the Loop.


<!-- AddThis Button BEGIN -->
<div class="addthis_toolbox addthis_default_style ">
<a class="addthis_button_preferred_1"></a>
<a class="addthis_button_preferred_2"></a>
<a class="addthis_button_preferred_3"></a>
<a class="addthis_button_preferred_4"></a>
<a class="addthis_button_compact"></a>
<a class="addthis_counter addthis_bubble_style"></a>
</div>
<script type="text/javascript" src="http://s7.addthis.com/js/250/addthis_widget.js#pubid=ra-4f6c88c855864ce0"></script>
<!-- AddThis Button END -->

Monday, August 1, 2011

Vintage Patio Furniture Picking

There's just something about old stuff- especially old stuff that is made of METAL. And I don't mean that thin, lightweight material places like Target calls metal.

For months (maybe years) Julie and I have been on the lookout for some retro, mid-century patio furniture... You know, the kind your grandmother had on her back porch.

This one sold for $1,075 on VintageGlider.com


Bottom line... it's hard to find this stuff and just too dang expensive to buy when you do.
BUT.........last week something amazing happened as I was driving through an old neighborhood in midtown. I spotted this beauty sitting on the front porch of an old house.


It was conveniently sitting beside two of these! But the ultimate question was... ARE THEY FOR SALE???


The house was for sale so I called the Realtor, got the owners phone number and proceeded to give them a call. They were glad to sell the set which belonged to her late mother for a whopping $125. I tried not to sound too excited on the phone!
The chairs were still sitting on the same porch they were placed on in the mid 1950s.


They had been painted several times so they needed some serious sanding. I used a wire brush and a pressure washer to take off the flaking paint... not a fun job, but a necessary one if you want a smooth painting surface.

My mission: to fully restore these old metal chairs and glider to their original mid century charm.

After getting the rust off, I used a primer to seal and protect the bare metal.


Tip: always paint the bottom first. This way you don't mess up the  most visible areas when you paint the other side.


The chair on the right has been primed; the chair on the left has not.


Next on the agenda... choosing the right color. We decided on Rustoleum's "leafy green". Julie loved the color and it's a shade of green that you would have commonly seen in the 50's. We wanted it to look just like it did when it rolled off the assembly line. You can find this paint at the Home Depot.


The bottom is now primed and we are starting to add the green paint.


Julie wanted me to paint the basket weave part white so taping was needed. It was pretty tedious and time consuming but we were so glad we added this little detail.


We painted the white parts first in Rustoleum "heirloom white". Then after the white paint dried, we added tape and painted on the green.

The last step was clear coating the furniture with a high gloss protective enamel.


Here are all the finishes I used.


Ready for the finished product?


I had the set appraised by Desiree Tate, owner of Antiques at the Loop in Mobile. She appraised the furniture at $1,400. Not a bad return on $125. But we don't plan on selling any time soon. Hopefully now this old furniture can see at least 50 more years.

Thursday, April 28, 2011

Yard Work

As some of you may know, last year we moved into a new house. After a grueling move following 6 long weeks of intense renovation (pictures coming soon), we were more than a little burned out. It has taken 8-9 months to muster the courage to tackle the yard.

This winter we began our landscaping adventures and I thought you all might want to see some of the pictures.


We started by planting a vegetable garden. As you can see, we had plenty of help.


We built 4'x8' planter boxes out of rough cut 12" boards and filled them with one part top soil and two parts cotton gin compost from a local guy who sells it by the truckload/trailer load. We got all we needed for our 3 garden planters for only $40.


Carter loves the owl.

Lettuce, cabbage, pepper, cucumbers, squash, tomatoes... An antique swing I picked up for $75. A fresh coat of white paint works wonders. This is where I sit while Julie does the weeding.
And herbs... We took advantage of an old stump close by, filled it with dirt and planted African basil, strawberries, sage, rosemary and thyme.
Strawberries!

We also planted some parsley by the trunk of our pecan tree.

Plants are growing, now on to other things... like a window box I built and planted with impatiens (perfect annuals for shady areas).

We found this old birdhouse when I pruned the Satsuma Trees in February. It got relocated near the workshop where it can be appreciated- not only by the birds but by us too.

Speaking of Satsumas, I also relocated this formerly dying Oak Leaf Hydrangea beneath one of our Satsuma trees and violently pruned it. After all, what did I have to loose? As you can see, it is VERY happy now in it's new home. I hope it blooms this year.

This hydrangea is already blooming. By the way, if you want your blue hydrangea to have pink blooms instead of blue, just add a little limestone around it. I like mine blue.

Blueberries! We planted 9 plants- 3 different varieties that should be ripening soon.

I also built this and planted a climbing rose on it.

New Dawn is its name... very prolific, fragrant, disease resistant, and it blooms from late Spring until late Fall! By Fall it should cover the 9' trellis.

A guy was selling these unfinished adirondack chairs on the side of the road. I couldn't believe how inexpensive they were! I painted them blue and distressed them. The oak trees helped me distress them even more. We will eventually pave this area with natural flagstone and add a fire pit... another project for another time :)

I know what you're thinking... child labor laws.


More herbs tucked along the driveway.

Signs courtesy of Blackwater Folk Art in Milton, FL  (Julie's step mom)
Give the boy a sprinkler and he's happy for hours.

Yellow Dasies (Mobile Botanical Gardens spring sale) and purple Salvia.

Can you imagine a flagstone pathway here?

Two planters with creeping Jenny and lemon cypress frame our front door.

Check out the bird's nest in the hanging planter on the back porch.

Potato vine, creeping Jenny (can you tell I love this stuff), red impatiens...


That's all for now. Stay tuned for more...